Xbox 360 repair details
Here's a detailed breakdown of each step taken in a typical Xbox repair and reflow here at M&J 360. These were taken of a console that a customer had first sent into Microsoft and had repaired, it worked for a short time before it broke again with an RRoD. They then sent it into us for a proper repair and reflow. Looking for us to fix your Xbox? Click the Repair Form link to get started.
 |
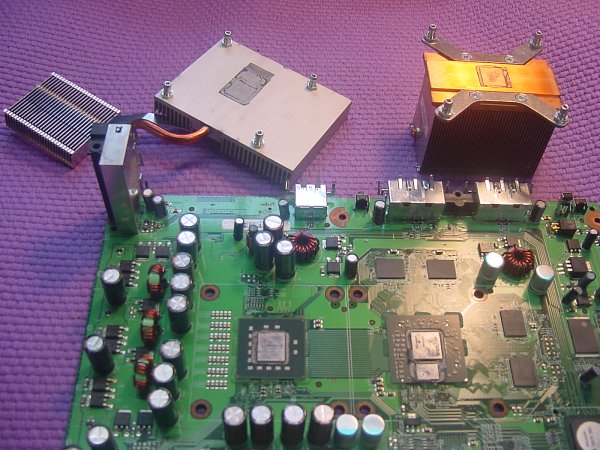
Step 1 Here is the root of the cause of the returning RRoD-Red Ring of Death, the X-Clamps. First step is to remove them. |
 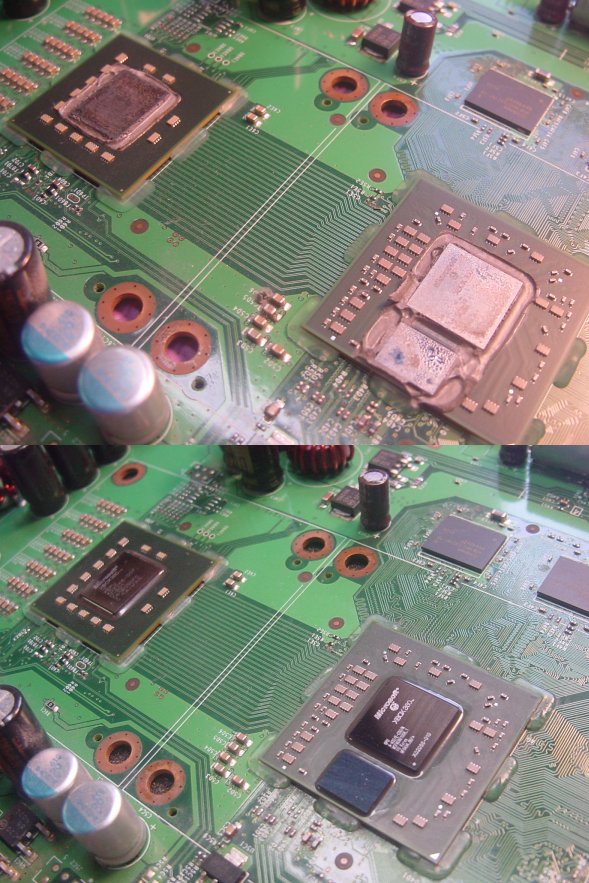 |
Step 2 The top picture here shows the heat sinks removed from the chips after the X-clamps are removed. As you can see there is alot of caked on crusty heat sink compound. The compound Microsoft uses gets very dried out and is not doing a good job of transfering heat to the heat sinks. <--- Second picture here shows a before and after close up on the chips that have been cleaned. |
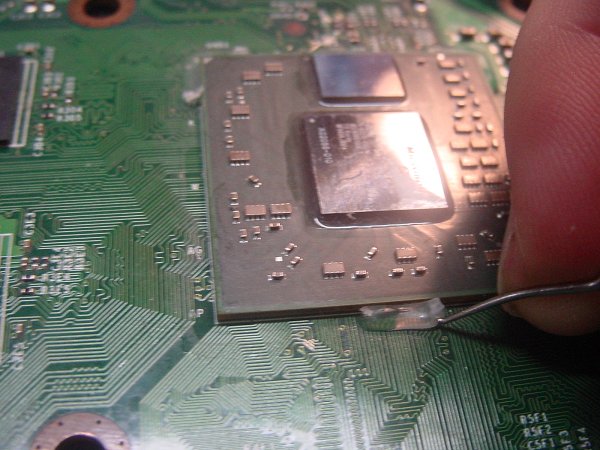 |
Step 3 In order to do a proper reflow of the chip the epoxy pads must be removed. The pads will melt and deform when the chip is heated. Removing them will not hurt anything as they are used by the factory to secure the chip to the board when it is being attached. |
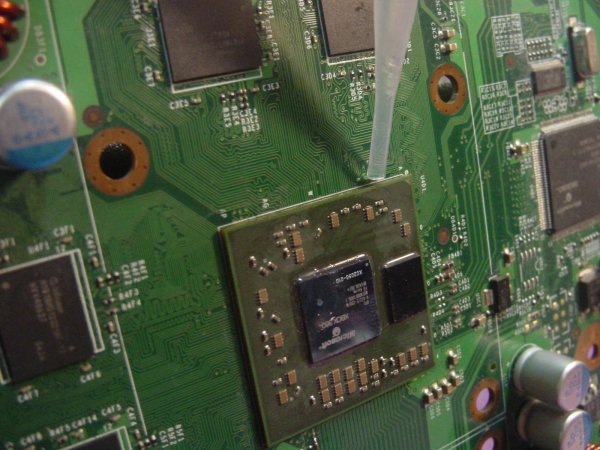 |
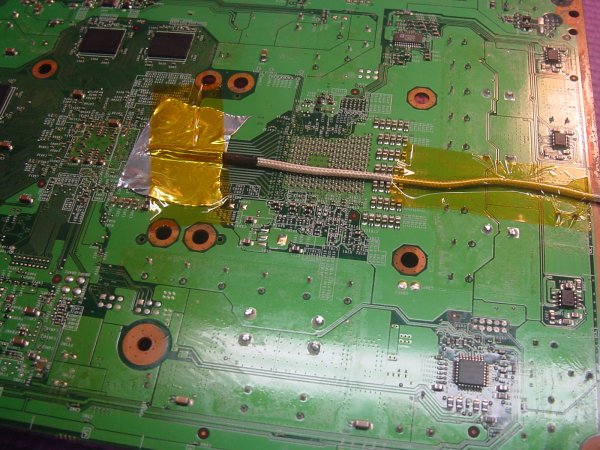
Step 4 Next the board is held on edge while flux is applied under the chip with a dropper. Adding flux makes the solder form a much stronger bond to the board during reflow. |
  |
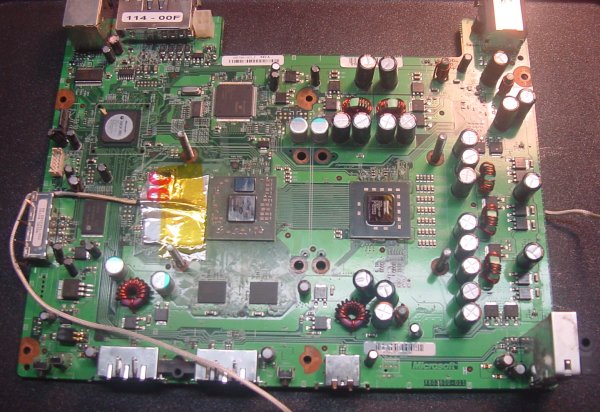
Step 5 The top picture here shows the digital thermometer that is used to monitor the tempature of the chip on both the top and underside of the board during reflow. <--- This picture shows the bottom tempature probe taped onto the board with special heat resistant tape. |
 |
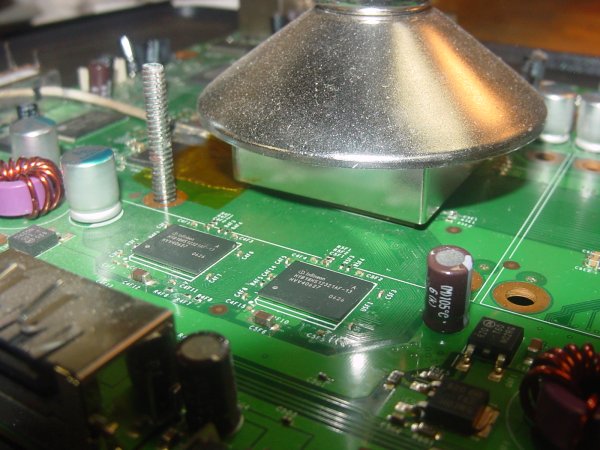
Step 6 Next the board is mounted onto a custom built preheater. The preheater is very important to the reflow process. It's used to first heat the board up to a safe tempature before the BGA reflow head is lowered ontop of the chip to preform the reflow. It also maintains a set tempature to area under the chip during the reflow so that there is minimal chance of board warping and provides even heating of the solder from both sides of the chip. Lastly it provides the quick but controlled cooldown of the board so no thermo shock occurs to the chip. You can also see the top side tempature probe taped down in this picture. |
 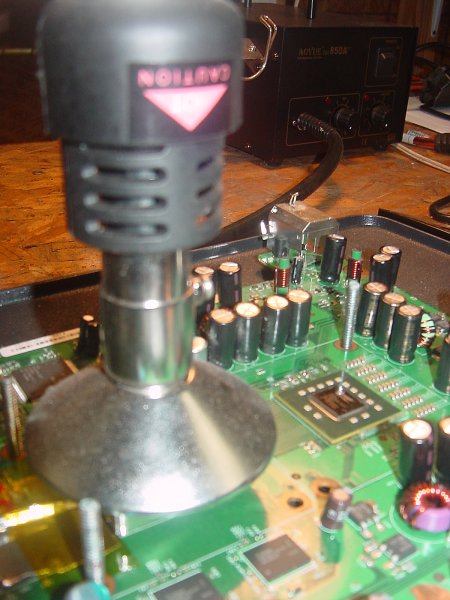 |
Step 7 Once the board is pre-heated to proper tempature the reflow head is lowered down over the problem chip and reflowing is started. Through much trial and error we here at M&J 360 have found the optimal times and tempatures to bring the chip up to and hold for the solder under it to reflow to the board. Each reflow requires certain tempatures to be met and held for short periods of time in order for the chip to evenly reflow. This is why simply using a heatgun is not a good way to do this as it can not hold tempatures like a professional BGA reflow station can. Not only can it not hold tempatures well it is very uneven heat and can cause damage to the other components found nearby to the chip. Never use a heatgun on your board. |
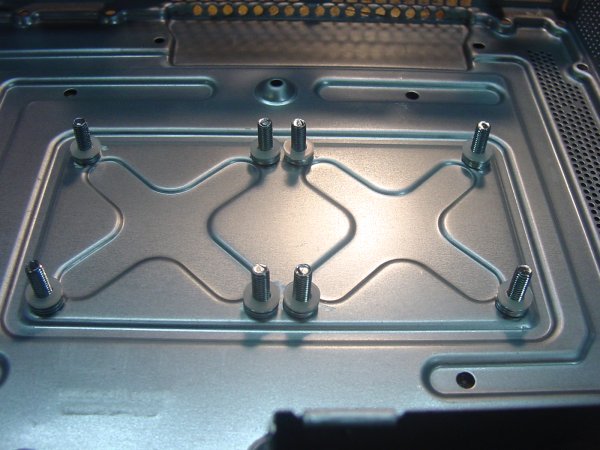 |
Step 8 While the board is cooling off the existing holes in the metal casing that holds the board are enlarged. Metal bolts are inserted and metal plus nylon washers installed, as shown. These bolts and washers are replacing the X-Clamps that caused the board warping and eventually the RRoD. These bolts will evenly pull the board down to the metal casing while keeping the board spaced level with the installed washers. |
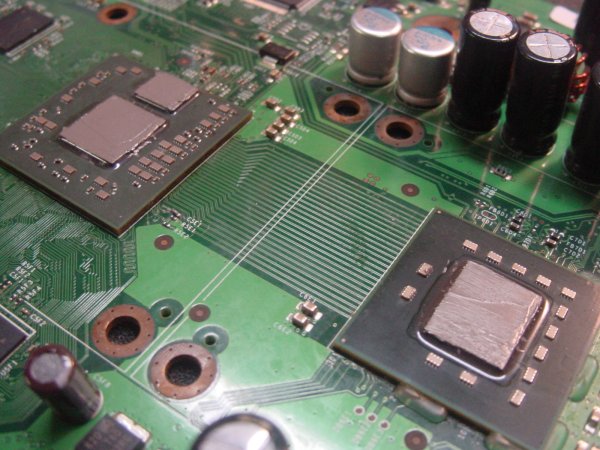 |
Step 9 Now that the board has cooled the chips have Artic Silver 5 applied to them. Artic Silver 5 is considered one of the best heat sink compounds on the market and will not dry out like the Microsoft stuff shown at step 2. |
 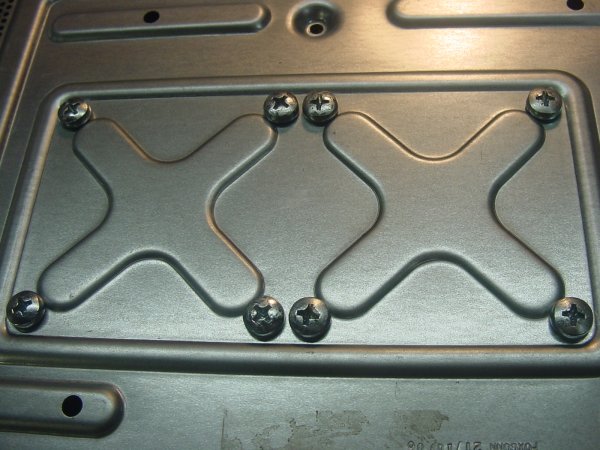 |
Step 10 The board is then installed back into the case and washers are added for proper heat sink spacing to the top side of the board. Here is a picture of the bottom of the case showing the bolt heads. This is also showing the large improvement over Microsoft's X-Clamps showin in step 1. The X-clamps shows are applying pressure to the underside of the board itself where as the replacment bolts are applying that pressure to the metal case not the board. This is the key to stopping the warping which causing RRoD. |
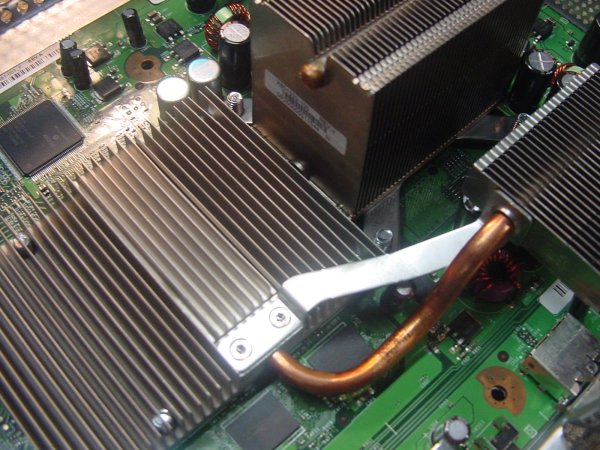 |
Step 11 Heat sinks have been reinstalled and tighted down to the proper torqs. |
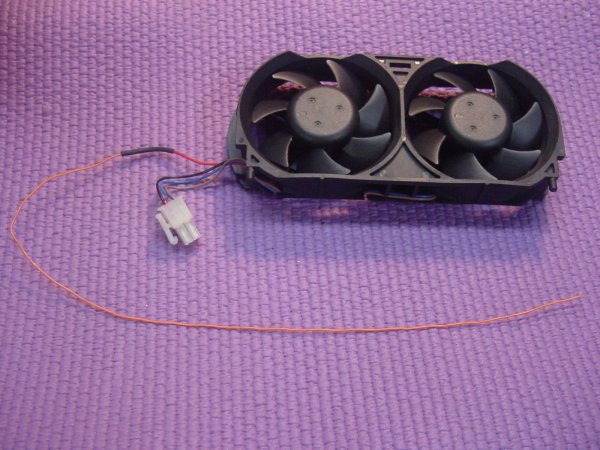 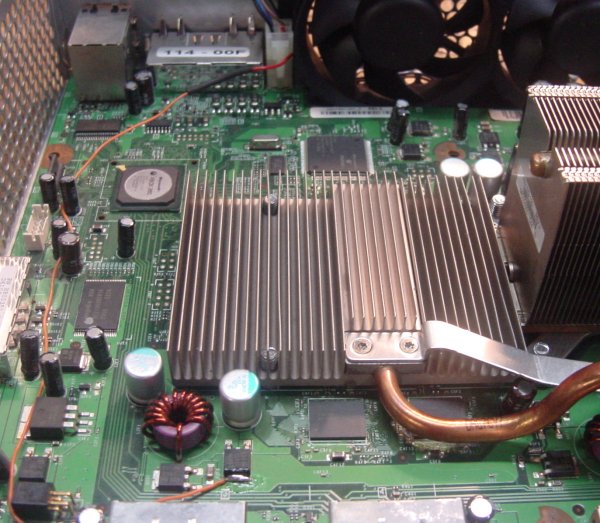 |
Step 12 This is the optional Fan mod step which we usually perform on most of our consoles. First picture is showing the wire that has been extended on one of the fans. This mod provides a full 12v to the fan at all times, speeding it up over what it would usually run at and providing the console with better cooling. This picure shows it installed. |
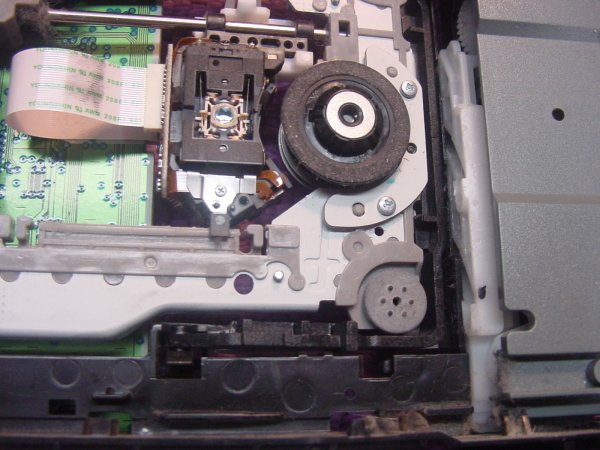 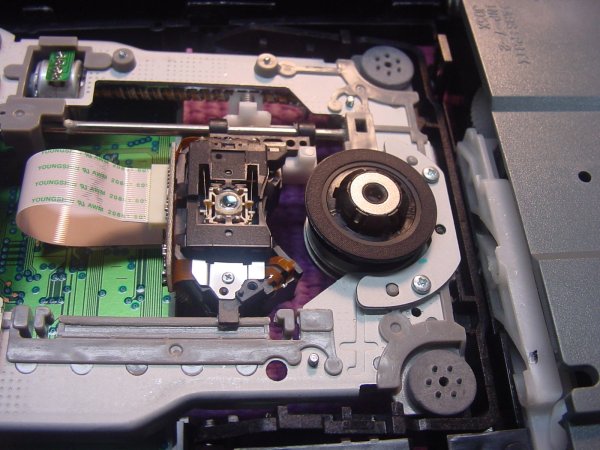 |
Step 13 Next the DvD drive is opened for cleaning and adjustment. As you can see in the top picture the drive is filled with dust and hair. We clean all of this out and then clean and polish the laser lens shown. Next the laser head and tray slides are lubricated and the tray eject belt is check for slipping and adjusted if need be. Bottom picture shows a clean and lubricated drive |
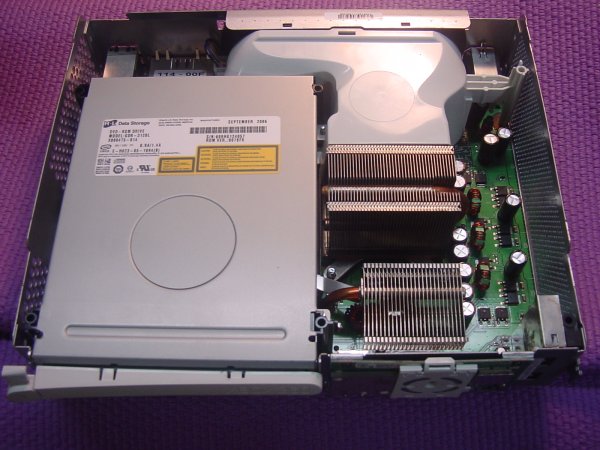 |
Step 14 Final step is to put the console back together, here's a picture of it complete before the covers are put on. |
Step 15
Once the console is put back together it goes to the testing phase. Where we run real world gaming tests on it for a total time of 15-20 hours. The console is run in 4-6 hours blocks of time and then shutdown and allowed to cool fully, then run again until 15-20hours of testing has occured. The reason behind is is it's the best way to test for a possible RRoD reoccurence. The board needs to be repeatedly heated and cooled to test the solder joints. Anyone who doesn't do proper testing on your console after a reflow is not really testing it at all. Microsoft themselves runs a load test disk in your console but it's for single time frame and is not repeated.
Ready to send in your console to M&J 360 for repair? Take the next step and fill our
Repair Form.